Cooking Day 20: Fresh Pasta Lasagna
Sunday night dinner. I have been so lazy lately, but I knew I had to put together a Sunday night dinner. I gave the guys three options, Chicken Pot Pies and salad, Pot Roast, or Lasagna. I should have known better (singing Richard Marx's "Should've Known Better").
Lasagna is one of those dishes that I have been making for so long. I cannot remember the first time I made it. All I know is that as a kid, this was my favorite food and anytime my mom would make it, I was there helping her until it was me making lasagna anytime we had it. I cannot remember when it happened, but there was a time my mom made the frozen lasagna, you know...the one in the red box. I hated it...well, I hated the ricotta. It was from then on that I just knew that ricotta was the most disgusting thing ever. What it took me almost 40 years to realize is that I didn't hate ricotta, I just hated the gross, frozen, cheap ricotta in those frozen lasagnas. When I had my first cannolli I could not believe how delicious and creamy the ricotta was. Then we had it on a pizza and yup...I was sold for good.
Up until recently, I had been using cottage cheese in place of the ricotta in lasagna. It's how my mom always made it and honestly I didn't know anything differently. It was still delicious. I made it that way for almost 30 years, but when I woke up to whole milk ricotta, I realized a couple of things. First, using ricotta didn't make my lasagna as soupy as the cottage cheese did, even if I did strain it. Second, it made the lasanga so much creamier and I didn't have to use so much shredded cheese. Now, don't get me wrong. I cook for people who are of the belief that there is no such thing as too much cheese...who am I fooling, I believe that too.
To kick this lasagna up one more notch, I decided I would not be using store-bought lasagna noodles. I made the pasta fresh. Fresh pasta is so good and honestly, I thought there would be no real difference, but there really is. Dried and boiled pasta has this chewiness to it that fresh pasta doesn't have. Fresh pasta has a more "toothy" texture. It is creamy and blends in with the rest of the ingredients. It is light and not heavy like a dried pasta is. It takes a little work and time, but if you have the time to do it (like on a three-day weekend) I completely recommend it.
By the way, thanks to my office mates three years ago who gifted me the pasta roller attachments for my Kitchenaid stand mixer for my birthday. I need to invite you all over for dinner once COVID is gone.
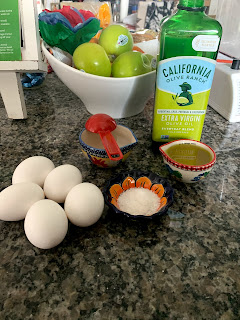
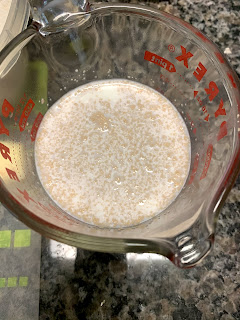
To make the pasta, I use Chef Anne Burrell's recipe and gather one pound of all purpose flour and shape it into a volcano mound on your flat working surface with a well in the middle. Into that well, add 4 whole eggs and 1 egg yolk, 1/4 cup of olive oil, a good pinch of salt and 1-2 tablespoons of water. Start with the 1 tablespoon and then as you work through the dough, add 1/2 tbsp more at a time, I only needed the one extra 1/2 tbsp.

Start whisking your wet ingredients together with a fork. Very slowly and carefully, begin to incorporate some of the flour closest to your well, not too much, and be careful not to break the sides of your well or you will have a big mess to clean up. I like to bring in flour from the outside of the mound until the mixture is stable enough to not run off.


Once your mixture is mixed together, you will need to begin kneeding it by hand. Those of you who have kneeded dough before know what to do, put your whole body into it. It will take about 10 minutes of kneeded before it is ready. While you are doing your kneeding, you will notice it go through multiple transformations. It will start out pretty shaggy, but the more you kneed it, it will become a little tough, then it becomes a little softer and there is this sheen the dough will have once it is ready. Once it is ready, wrap it in plastic wrap and let it sit for at least an hour. At this point you will already notice a huge difference between fresh and boxed pasta. The fresh pasta is just a completely different color. It is more yellow, taking in all that fat and protein from the eggs and yolk. It just shows you how much richer it is going to be.


While the pasta rests, I cook my Italian sausage and ground beef in a pan with heated olive oil, chopped garlic and diced onions. I crumble the meat mixture and add salt...ONLY SALT. Let it cook down and once cooked through, drain off the grease and then I added one jar of pasta sauce (hey, don't judge me) and one can of crushed tomatoes (see...semi-from scratch...I did a lot of work already and there's more to come). Combine the meat and sauce and lower your heat to get it to simmer...low and slow is the way, I mean, there's time.


I actually let the pasta rest a little longer than the one hour because I cleaned up the kitchen and then watched an episode of Property Brothers. Right now, they are one of my go-to shows while home. So it rested about two hours. When the meat sauce had simmered long enough, I turned it off and then got to rolling my pasta sheets.
ENTER TONY! LOL...He had worked the night before so I didn't force him over for the beginning.
I unwrapped my pasta dough and cut it into fourths. I took one of the pieces and shaped it into a rectangle and thinned it a bit, just like I would a pizza dough, just so it can fit through the pasta roller. With the sheeting attachment on 1 and the speed on 2, I feed the small bit of dough through once and then fold in thirds. Make sure when you put it through the second time, the tip of the fold is pointed up, you don't want it to get jammed in the roller. Put it through on the 1 setting twice more, no need to fold it again. Then you will make your way through each thickness setting 2-6 running the pasta through three times on each setting. It will blow your mind to see how this little bitty piece of dough stretches. Measure the sheet to fit your lasagna dish and begin your layering. Tony and I cut and layered as we went so we didn't have to worry about our sheets drying up.


When I layer lasagna, I start with the meat sauce on the bottom to prevent the pasta from sticking to the bottom, then pasta, sauce, ricotta, shredded cheese (mozzarella, because duh and colby jack, because my mom always did) and then fresh basil. I do the top layer a little differently, pasta, ricotta, sauce and then shredded cheese and basil. Cover it with foil, tenting slightly to avoid pulling off the top layer completely, and bake at 375-degrees for 30 minutes, then removing the foil and baking an additional 30 minutes until brown and bubbly. Let it cool a bit, you do not want to burn your mouth and then serve.


Usually this is accompanied with a salad, usually Caesar, but dammit I was tired. Leave me alone. See you next time.


Lasagna is one of those dishes that I have been making for so long. I cannot remember the first time I made it. All I know is that as a kid, this was my favorite food and anytime my mom would make it, I was there helping her until it was me making lasagna anytime we had it. I cannot remember when it happened, but there was a time my mom made the frozen lasagna, you know...the one in the red box. I hated it...well, I hated the ricotta. It was from then on that I just knew that ricotta was the most disgusting thing ever. What it took me almost 40 years to realize is that I didn't hate ricotta, I just hated the gross, frozen, cheap ricotta in those frozen lasagnas. When I had my first cannolli I could not believe how delicious and creamy the ricotta was. Then we had it on a pizza and yup...I was sold for good.
Up until recently, I had been using cottage cheese in place of the ricotta in lasagna. It's how my mom always made it and honestly I didn't know anything differently. It was still delicious. I made it that way for almost 30 years, but when I woke up to whole milk ricotta, I realized a couple of things. First, using ricotta didn't make my lasagna as soupy as the cottage cheese did, even if I did strain it. Second, it made the lasanga so much creamier and I didn't have to use so much shredded cheese. Now, don't get me wrong. I cook for people who are of the belief that there is no such thing as too much cheese...who am I fooling, I believe that too.
To kick this lasagna up one more notch, I decided I would not be using store-bought lasagna noodles. I made the pasta fresh. Fresh pasta is so good and honestly, I thought there would be no real difference, but there really is. Dried and boiled pasta has this chewiness to it that fresh pasta doesn't have. Fresh pasta has a more "toothy" texture. It is creamy and blends in with the rest of the ingredients. It is light and not heavy like a dried pasta is. It takes a little work and time, but if you have the time to do it (like on a three-day weekend) I completely recommend it.
By the way, thanks to my office mates three years ago who gifted me the pasta roller attachments for my Kitchenaid stand mixer for my birthday. I need to invite you all over for dinner once COVID is gone.
To make the pasta, I use Chef Anne Burrell's recipe and gather one pound of all purpose flour and shape it into a volcano mound on your flat working surface with a well in the middle. Into that well, add 4 whole eggs and 1 egg yolk, 1/4 cup of olive oil, a good pinch of salt and 1-2 tablespoons of water. Start with the 1 tablespoon and then as you work through the dough, add 1/2 tbsp more at a time, I only needed the one extra 1/2 tbsp.

Start whisking your wet ingredients together with a fork. Very slowly and carefully, begin to incorporate some of the flour closest to your well, not too much, and be careful not to break the sides of your well or you will have a big mess to clean up. I like to bring in flour from the outside of the mound until the mixture is stable enough to not run off.

Once your mixture is mixed together, you will need to begin kneeding it by hand. Those of you who have kneeded dough before know what to do, put your whole body into it. It will take about 10 minutes of kneeded before it is ready. While you are doing your kneeding, you will notice it go through multiple transformations. It will start out pretty shaggy, but the more you kneed it, it will become a little tough, then it becomes a little softer and there is this sheen the dough will have once it is ready. Once it is ready, wrap it in plastic wrap and let it sit for at least an hour. At this point you will already notice a huge difference between fresh and boxed pasta. The fresh pasta is just a completely different color. It is more yellow, taking in all that fat and protein from the eggs and yolk. It just shows you how much richer it is going to be.

While the pasta rests, I cook my Italian sausage and ground beef in a pan with heated olive oil, chopped garlic and diced onions. I crumble the meat mixture and add salt...ONLY SALT. Let it cook down and once cooked through, drain off the grease and then I added one jar of pasta sauce (hey, don't judge me) and one can of crushed tomatoes (see...semi-from scratch...I did a lot of work already and there's more to come). Combine the meat and sauce and lower your heat to get it to simmer...low and slow is the way, I mean, there's time.

I actually let the pasta rest a little longer than the one hour because I cleaned up the kitchen and then watched an episode of Property Brothers. Right now, they are one of my go-to shows while home. So it rested about two hours. When the meat sauce had simmered long enough, I turned it off and then got to rolling my pasta sheets.
ENTER TONY! LOL...He had worked the night before so I didn't force him over for the beginning.
I unwrapped my pasta dough and cut it into fourths. I took one of the pieces and shaped it into a rectangle and thinned it a bit, just like I would a pizza dough, just so it can fit through the pasta roller. With the sheeting attachment on 1 and the speed on 2, I feed the small bit of dough through once and then fold in thirds. Make sure when you put it through the second time, the tip of the fold is pointed up, you don't want it to get jammed in the roller. Put it through on the 1 setting twice more, no need to fold it again. Then you will make your way through each thickness setting 2-6 running the pasta through three times on each setting. It will blow your mind to see how this little bitty piece of dough stretches. Measure the sheet to fit your lasagna dish and begin your layering. Tony and I cut and layered as we went so we didn't have to worry about our sheets drying up.

When I layer lasagna, I start with the meat sauce on the bottom to prevent the pasta from sticking to the bottom, then pasta, sauce, ricotta, shredded cheese (mozzarella, because duh and colby jack, because my mom always did) and then fresh basil. I do the top layer a little differently, pasta, ricotta, sauce and then shredded cheese and basil. Cover it with foil, tenting slightly to avoid pulling off the top layer completely, and bake at 375-degrees for 30 minutes, then removing the foil and baking an additional 30 minutes until brown and bubbly. Let it cool a bit, you do not want to burn your mouth and then serve.

Usually this is accompanied with a salad, usually Caesar, but dammit I was tired. Leave me alone. See you next time.


Comments
Post a Comment